Ever lit a candle and felt instantly transported—to a rainy forest, a cozy cabin, or your favorite quiet nook? That’s the magic of scent. And nothing captures it quite like handmade candles made with care, clean ingredients, and a dash of personal love.Today, we're inviting you into the beautiful, earth-friendly world of soy candle making. Whether you're a passionate DIYer or simply searching for the Best Scented Candles in Australia, this guide will help you create your own aromatic haven—starting right at your kitchen counter.
Why Soy? Why Now?
Soy wax is every green-hearted crafter’s dream. It's derived from soybeans, burns slower and cleaner than paraffin, and is biodegradable. In other words: it’s better for you, your air, and the planet.If you're someone who loves the Smell of The Rain or fresh, botanical aromas, soy wax holds fragrance like a charm. It’s the perfect foundation for creating candles that feel as good as they smell.
What You’ll Need to Get Started
Gather these supplies—most are easy to find online or at local craft stores:
- Natural soy wax flakes
- Eco-friendly wicks (cotton or wood, lead-free)
- Fragrance oils or essential oils (think earthy, calming notes)
- Glass jars or upcycled containers
- Double boiler or microwave-safe jug
- Thermometer
- Stirring stick (a wooden skewer or chopstick works great)
- Wick holder or centering tool
The Candle-Making Process (It’s Simpler Than You Think)
1. Prep Like a Pro
Lay down some newspaper or a towel. Clean your jars and secure the wick in the center. Clothespins or wick holders help keep them steady and upright.
2. Melt the Wax
Using a double boiler, melt your soy wax slowly. Stir occasionally and aim for a smooth, even melt. (If you're using a microwave, heat in 30-second bursts and stir between rounds.)💡 DIY Tip: Don’t have a double boiler? No worries! Just fill a medium pot with a few inches of water, place a heat-safe glass or metal bowl on top (make sure it fits snugly), and bring the water to a gentle simmer. The bowl should sit above the water—not touch it. This indirect heat method prevents the wax from overheating or burning.
3. Add Your Signature Scent
Once the wax cools to about 60°C (140°F), stir in your fragrance. A little goes a long way. For a nature-inspired vibe, blend sandalwood and ozone notes to recreate the unmistakable Smell Of The Rain
4. Pour with Intention
Carefully pour the scented wax into your jars, leaving a bit of space at the top. Pour slowly to minimize bubbles and spills. Then, let your candles rest and set.
5. Trim, Cure, and Light
Once fully cooled (about 4–6 hours), trim the wick to just under 1cm. For a richer scent throw, let your candles cure for 2–3 days before burning.
Tips for the Eco-Conscious Creator
- 🌿 Repurpose containers: Old teacups, mason jars, or even coconut shells.
- 🔄 Reuse leftover wax: Blend old candle scraps for custom creations.
- ♻️ Label sustainably: Choose recycled paper or compostable tags.
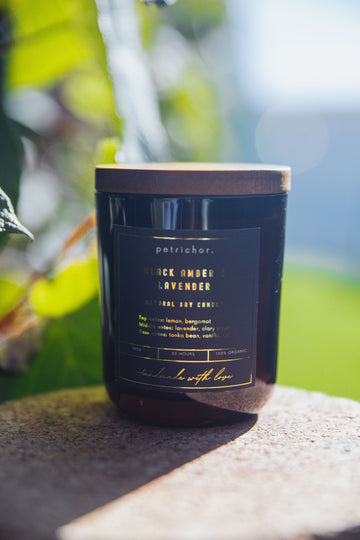
Final Thoughts: Light That You Made With Love
There’s something empowering about making your own handmade candles. It's not just about fragrance—it's about creating moments. Lighting a candle you made, infused with the scent of calm or nostalgia, like the Smell of The Rain, adds a layer of meaning to your space. Looking for the Best Scented Candles Australia has to offer? Or maybe you're ready to start your own? Either way, your journey begins here—with clean wax, mindful hands, and a heart full of cozy intentions.